What I’ve learned about white concrete countertops in our kitchen! Should you DIY or hire a professional? Learn all about cement kitchen countertops…let’s go!
Concrete Countertops in the Kitchen
Being able to DIY your own kitchen countertops can save money and provide you with a completely customized look. However, once poured, these countertops are permanent! In this post, learn all about cement countertops.
If you’re on the fence, check out our post about the pros and cons of concrete countertops!
If you have little experience with concrete, hiring some professional help is a good idea! We hired a contracting crew to help us with our renovations, and I am SO grateful for their combined knowledge – lots of brains are better than one!
While I don’t doubt this would be a great DIY project, there is a LOT to consider. I would highly suggest having someone on hand that is very experienced in concrete pouring.
Table of contents
- Concrete Countertops in the Kitchen
- How to DIY Concrete Countertops
- Supplies Needed
- How to Pour
- How to Seal
- Concrete Countertops FAQ
- Price of Concrete Countertops (120 SF cost breakdown)
- Helpful Tips for Pouring
- Our Experience with Concrete Countertops
- Explore all about Paints and Finishes
- Little Black Book of Color
How to DIY Concrete Countertops
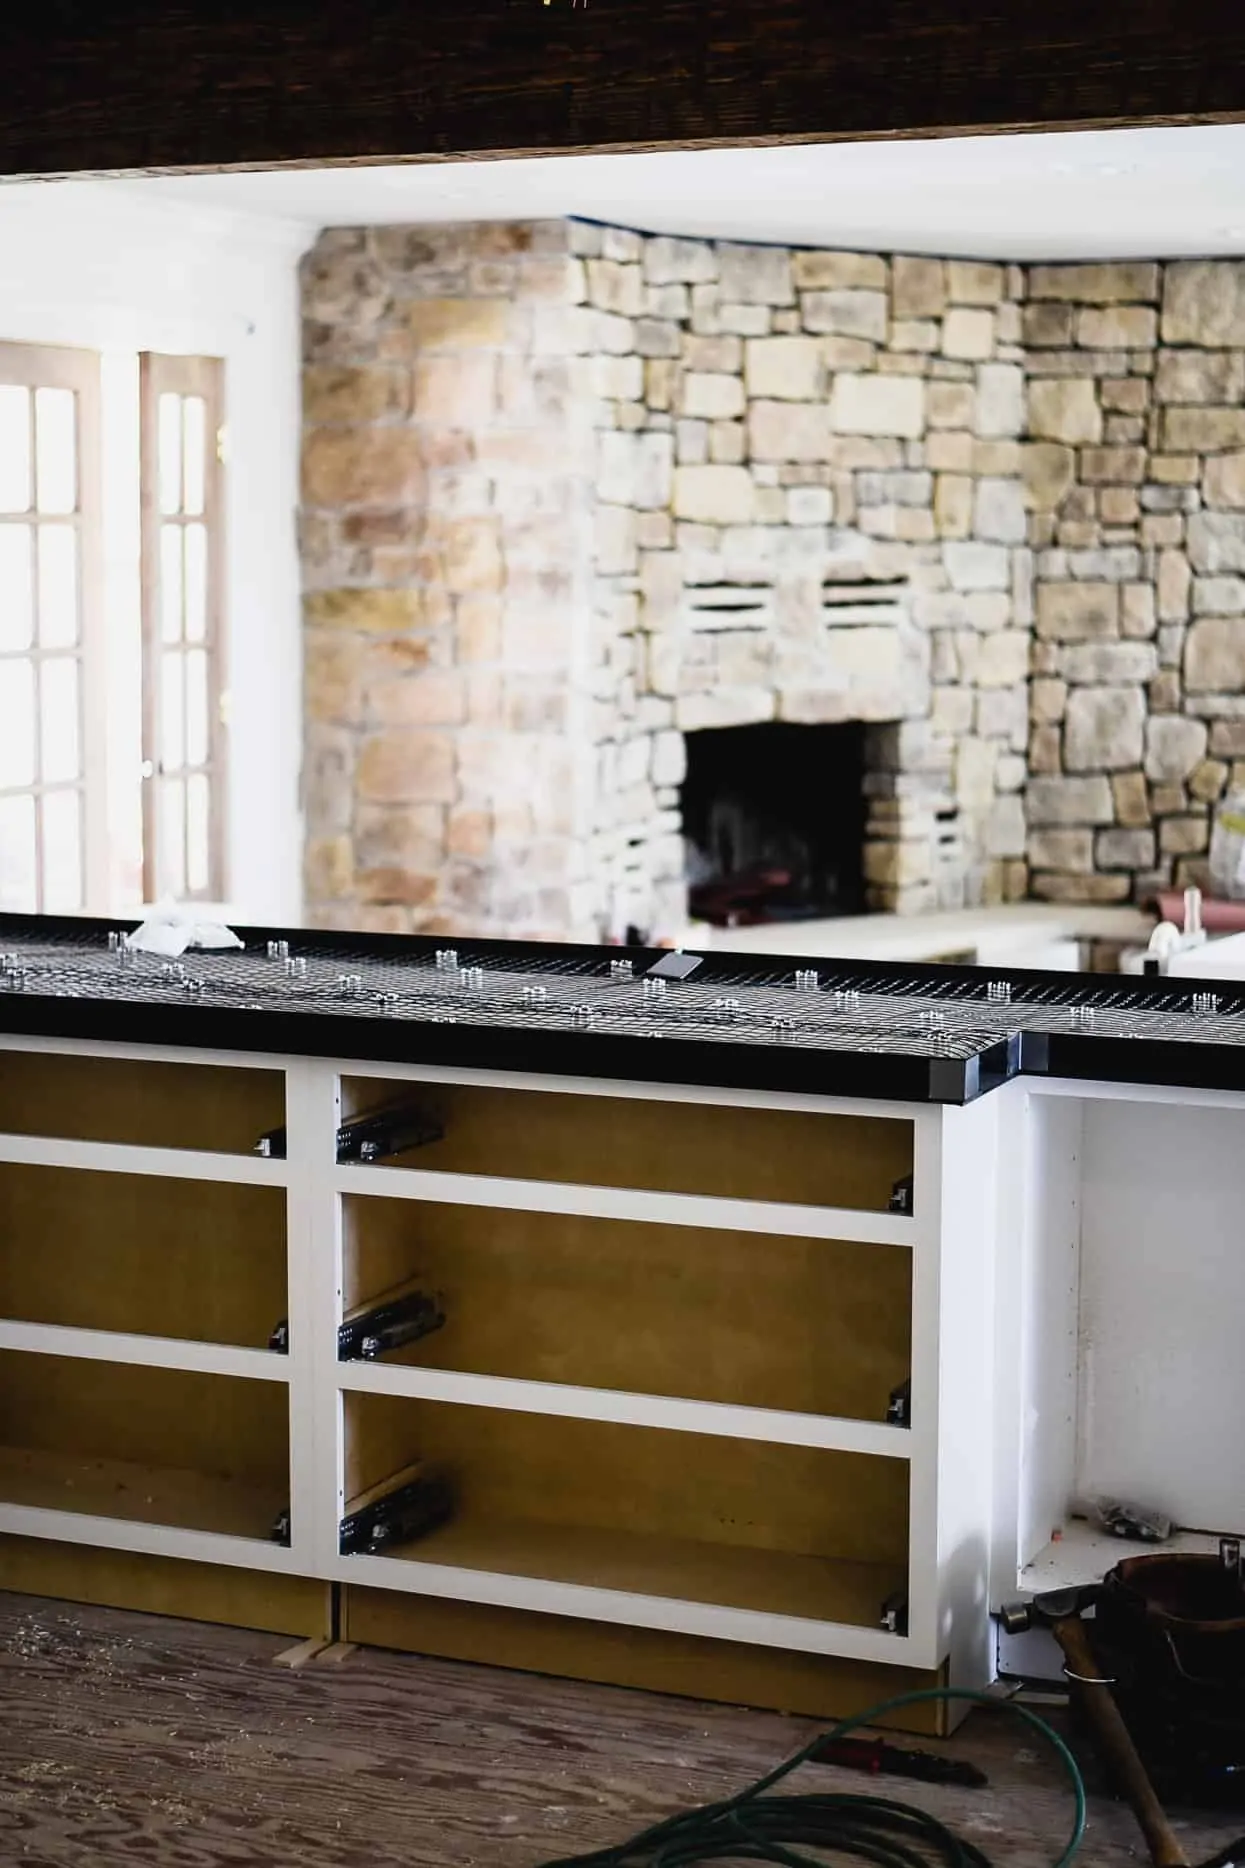
- Start by adding concrete board to the base of the countertop.
- Screw the countertop forms into place.
- Use caulk to fill all holes and seams (spend a lot of time doing this!).
- Then, add in the mesh and secure it into place using the “z clips”.
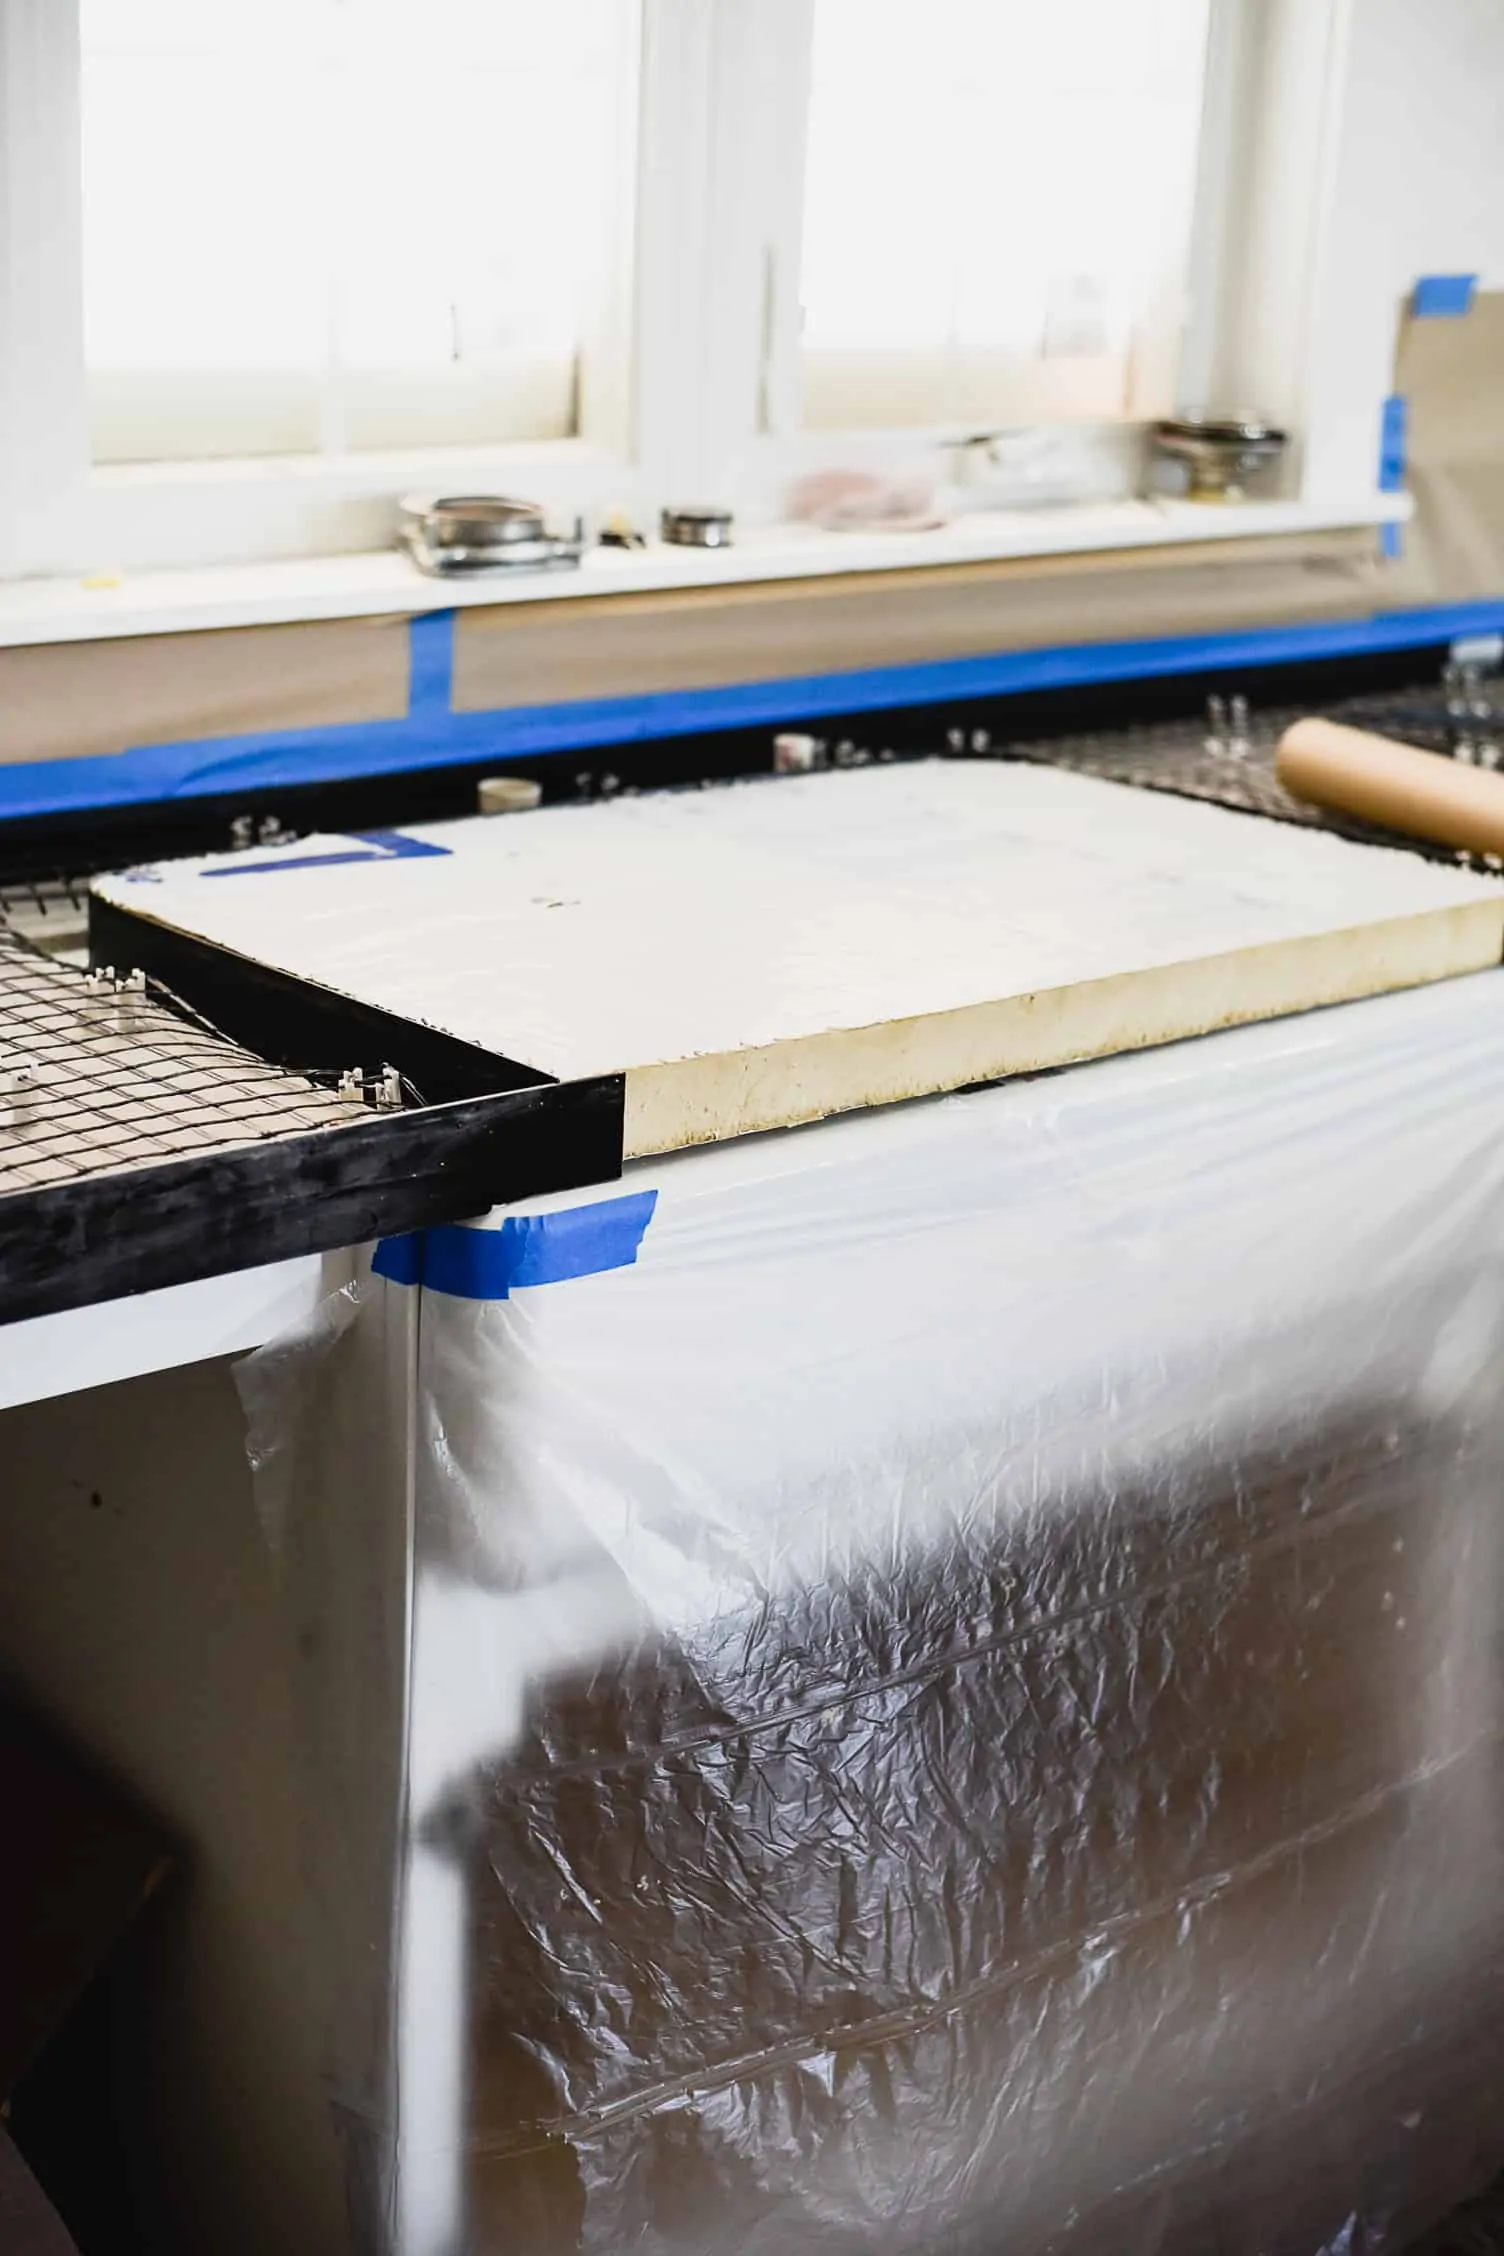
- Finally, you’re ready to mix the concrete! Plan to have a few hands on deck for this. Have one person mix while another pours, and a third person levels the concrete. Tip: To level the countertops, we used the edge of a 2×4!
- Once the concrete cures, you can apply your sealant. Make sure to follow the curing time periods specified on the sealant you select.
Supplies Needed
- concrete mix
- countertop forms
- mesh
- mesh clips
- concrete board base
- buckets
- concrete mixer
- gem pads
- magnesium float
- caulk
- trowel
- a roller for applying sealant
- Sealant (we used the STONELOK Sealant System)
How to Pour
Putting the Forms on & Installing the Mesh
The concrete countertop system we purchased came with molds, mesh, and little “z-clips” to hold the mesh in place. We installed a base of concrete board on top of the cabinets, then screwed the forms into place. Afterwards we installed the mesh which is used like rebar.
The forms are really quite simple to install, you just screw them in. It’s important to cut precise 45 angles for the corners. The guys used caulk to fill the cracks where the concrete boards met, as well as the screw holes, corners, and anywhere else that concrete might seep out. Take your time doing this step caulking every single hole/gap!
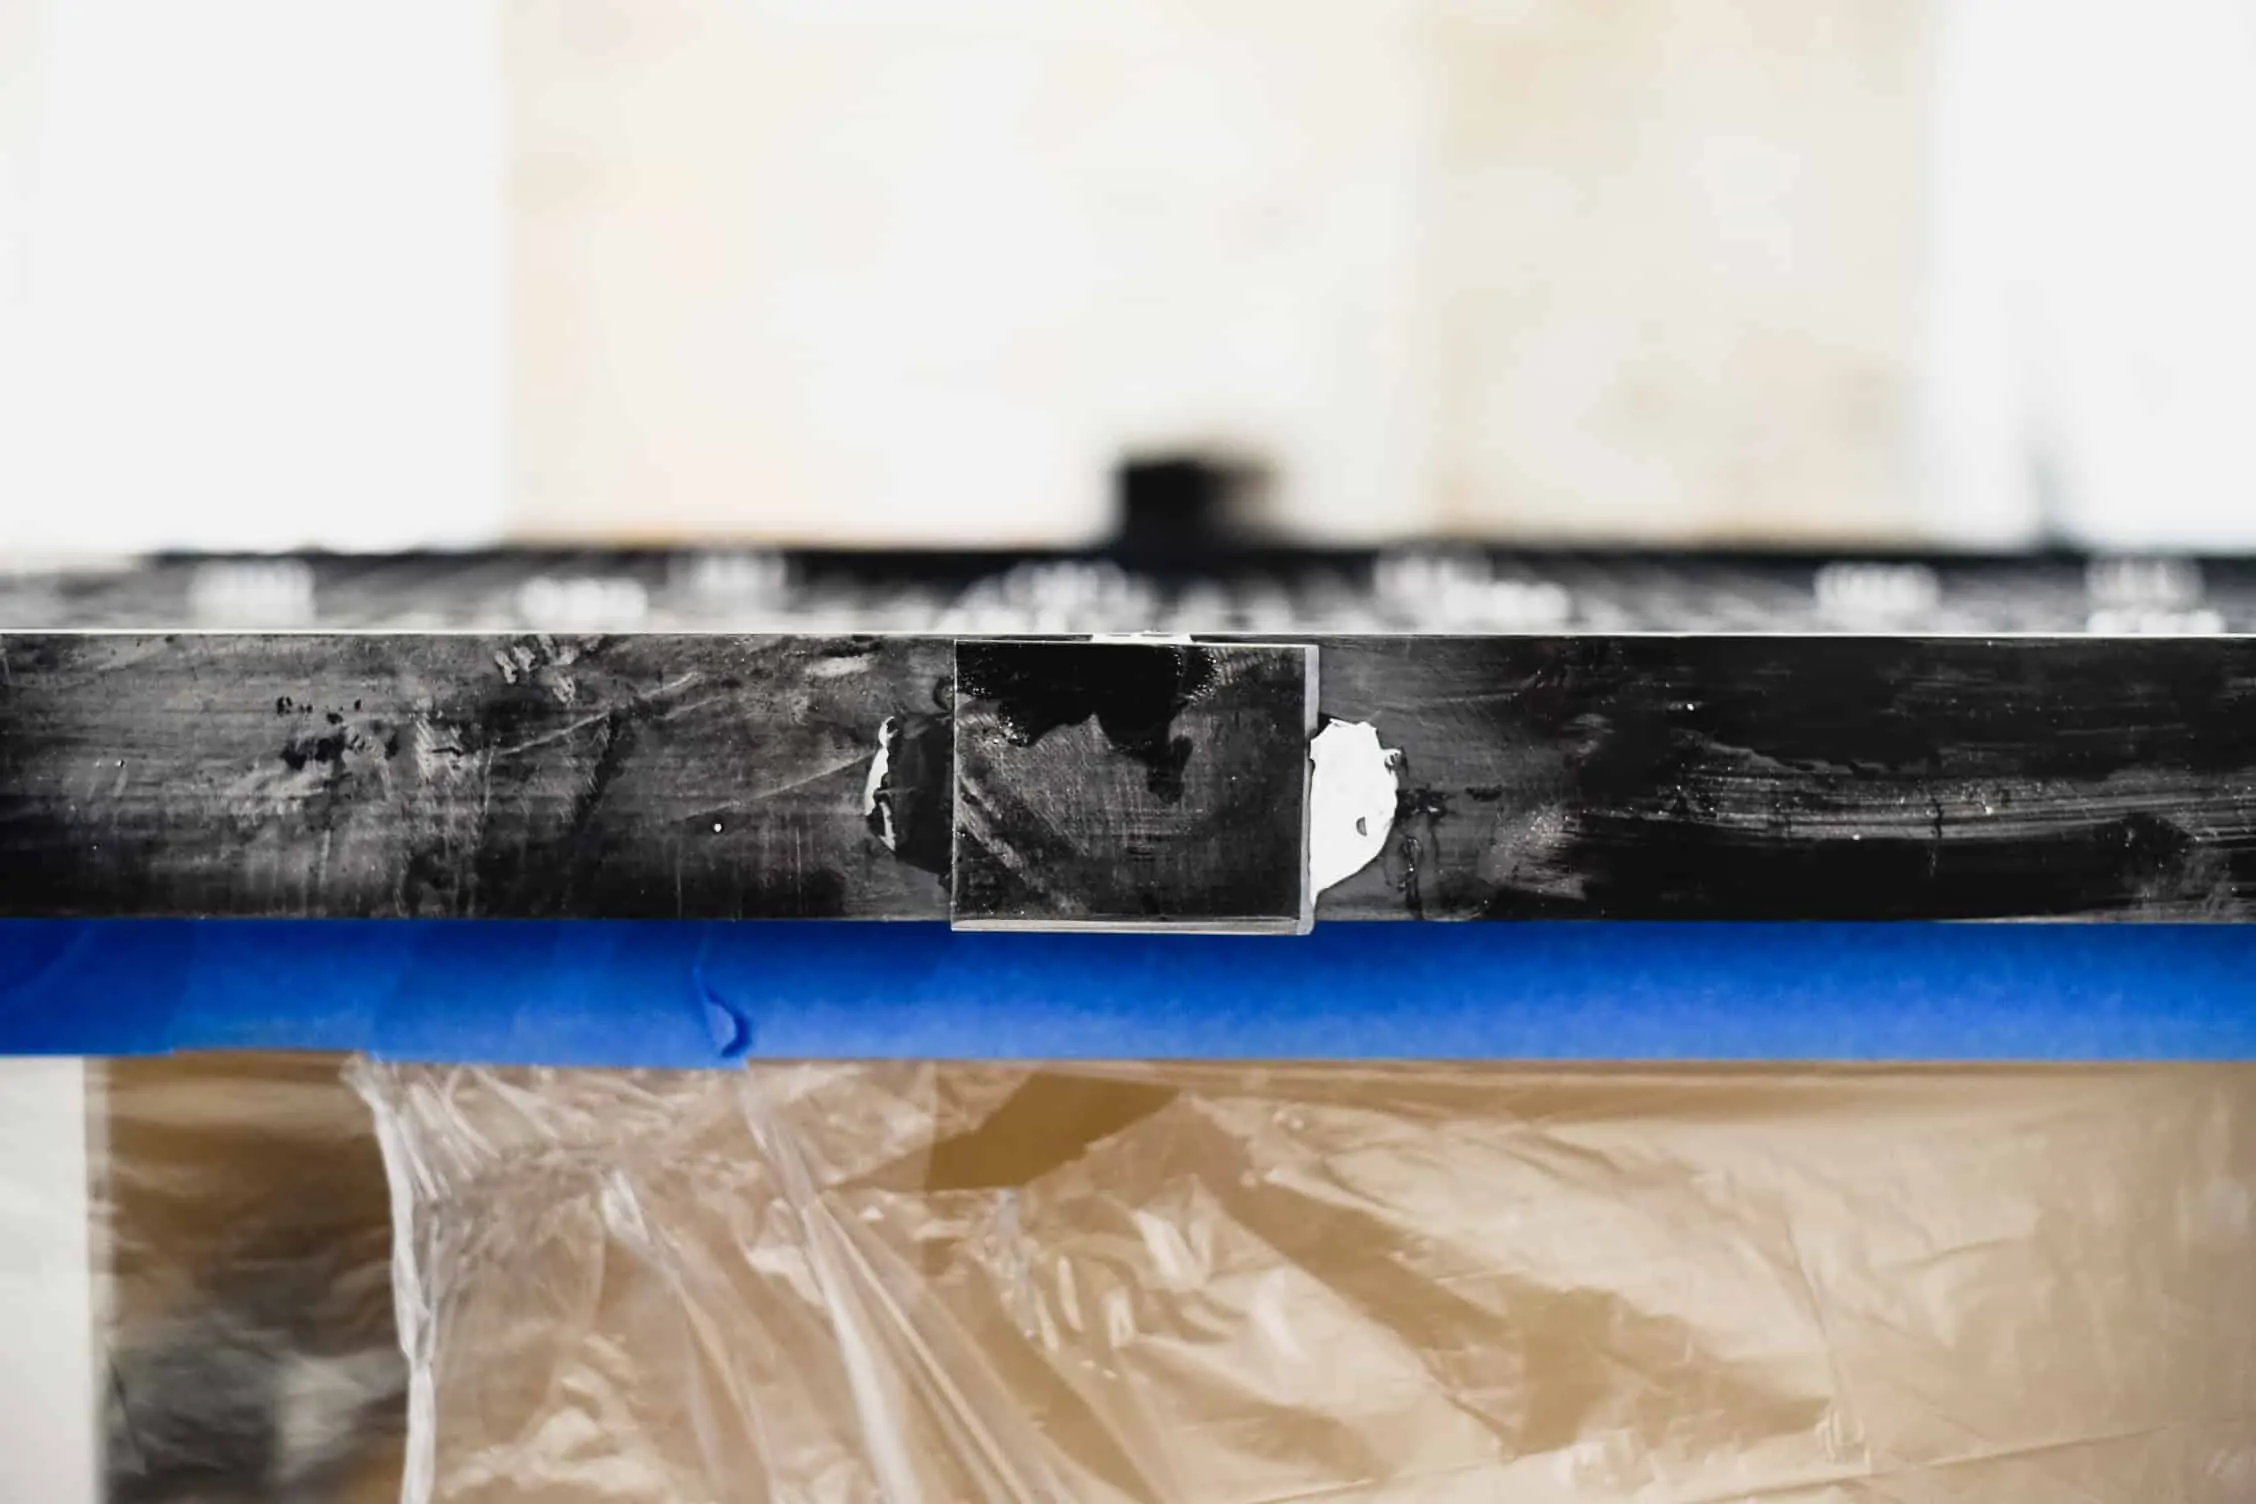
After the clips and mesh were installed, Jeff (our contractor) glued a small piece of plastic to the exterior of the corners and form seams. I saw that Domestic Imperfection had slight seam lines from where the concrete shifted the forms. Glueing plastic to the outside of the form will support them so that you don’t get a seam line. Jeff is the man (see pic below)!
Mixing the Concrete (Texture)
We spoke with many cement countertop companies over the phone to learn what the thickness and texture of the cement should be to pour. The concrete should be almost play-dough like: don’t add more water! It might seem too thick, but this is the preferred texture and thickness.
Pouring Around the Sink
If using an undercount sink or farmhouse sink for your kitchen, you’ll need to make a mold. Install the sink first, then use foam to create a mold of the sink. Wrap the mold with the countertop forms to prevent cement from filling the sink.
How to Seal
Concrete Countertops FAQ
You can use regular cement, but many companies sell countertop specific cement. That is what I recommend.
We purchased a special cement mix from Concrete Countertop Solutions. The cement is roughly $50/bag, but costs about as much per bag to ship.
Price of Concrete Countertops (120 SF cost breakdown)
- White Concrete | 50 bags @ $29 = $1450
- Wire Mesh | 2 rolls @ $49.99 = $99.98
- Square Edging | $398.00
- Z Clips | 79.96
- 2 Gem pads | 119.98
- Magnesium Float | $26.99
- 2 Trowels | $76.00
- Shipping | $1,475.02
- 15% bulk discount | (@455.64)
- Cement Board | approx. $200
- Total cost: $3,338.29 w/o labor
- Labor: roughly 4 days w/2 men minimum
Helpful Tips for Pouring
- Concrete board should be used as a backer, which prevent any liquid damage. Plywood is not recommended.
- The concrete will mix better if you don’t turn the mixer off at all during the mix process (so have two-three people handy).
- We decided we would pour, level, and work as minimal as possible. Once set (30-45 min) you can work more, filling ‘pin holes’.
- Do a test pour with a small dummy mold to make sure you have the hang of pouring, leveling, and that the consistency of the cement is just right.
Our Experience with Concrete Countertops
We started the process with test pours. And I am so glad we did. Honestly, just so that I knew what to expect before we did the entire countertop. We created a small rectangular mold to test – I didn’t look at it very much until 24 hours later when we pulled the forms off.
So here’s the thing: I definitely wouldn’t call the cement white.
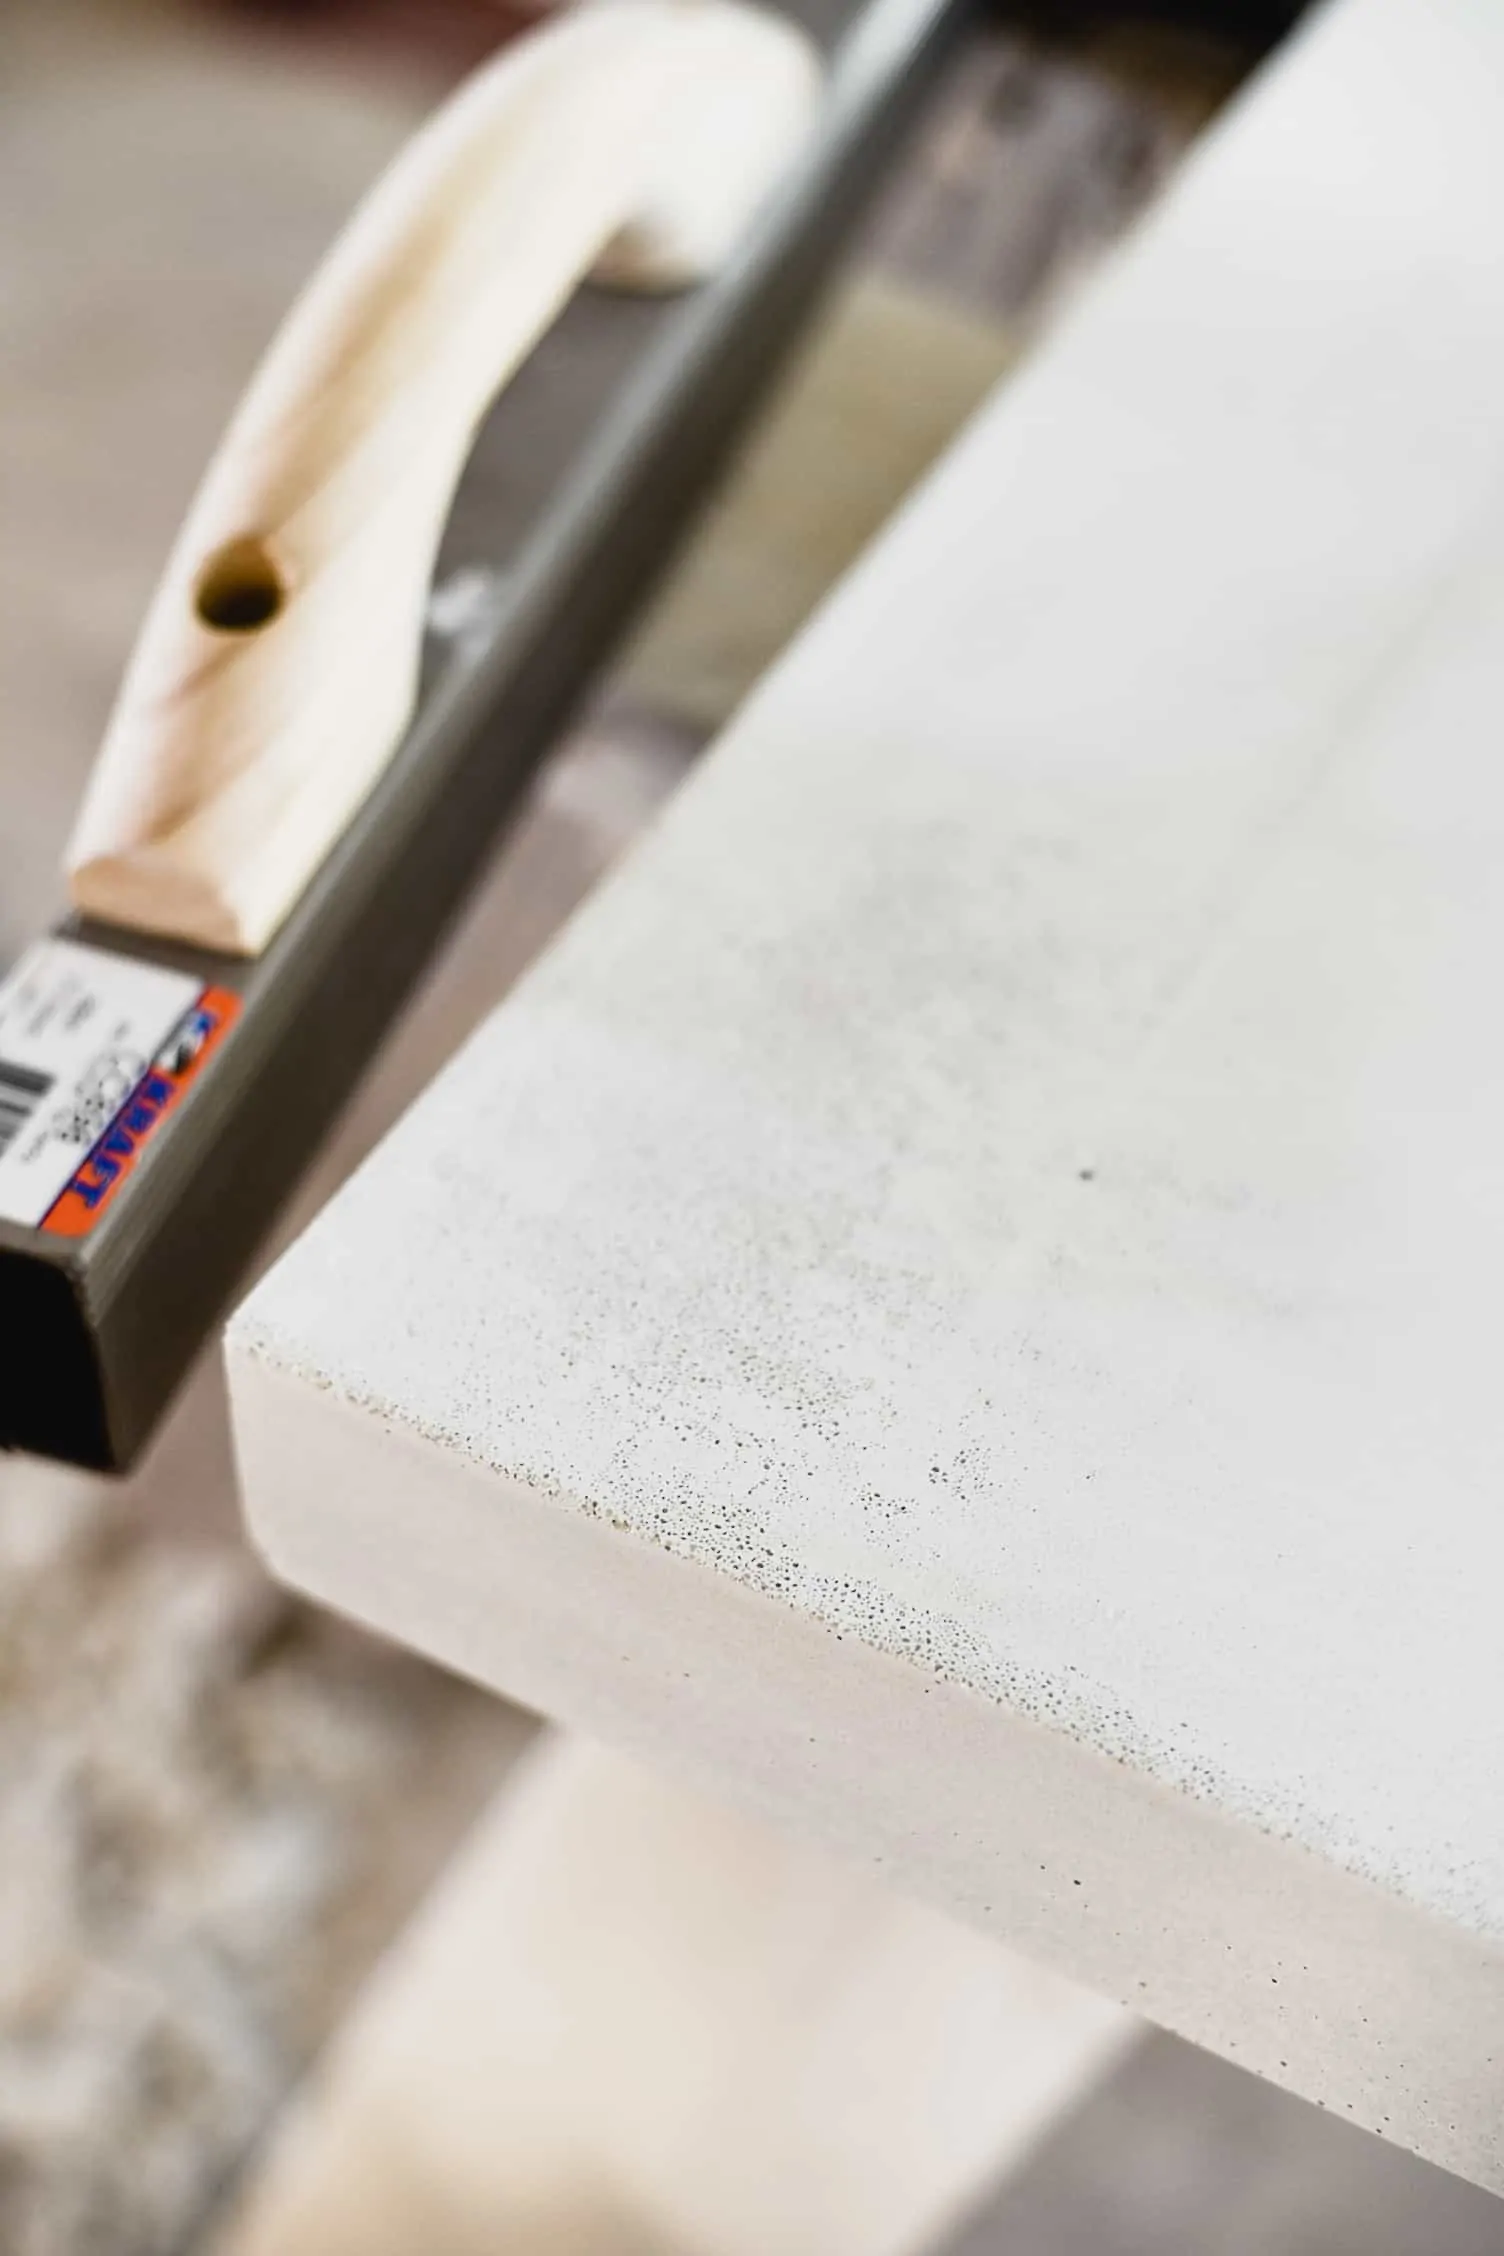
I really really wanted that crisp white look. So I was initially disappointed by the look of our test pour. Even though we purchased white concrete mix, they poured out pretty gray (similar to a sidewalk). After drying, they have lightened up a bit and I would call them a very light gray.
I was also surprised: you can see the sand speckles – aggregate.
While I was hoping for a very creamy white look, there is quite a bit of aggregate peeking through the surface. I sanded a tiny bit just to see what would happen, and instantly, more aggregate showed through (see below). So heads up, don’t sand (if you don’t want aggregate)!! Put in as much work as possible while pouring so that you don’t have to sand at all (leveling everything!)
Explore all about Paints and Finishes
Be sure to check out our paint-related articles to dive deeper into color trends, techniques, and tips for your next project! Whether you’re looking to refresh your living room or discover the best finishes for your exterior, we’ve got you covered. Stay inspired and get the best advice for all your painting projects!
Designer’s Review: Sherwin Williams Pure White SW7005
The Best Red Paint Color Ideas to Transform Your Space
A Designer’s Guide to the Best Warm White Paint Colors
How to Choose the Best Interior Paint Colors for Your Home
A Green Bathroom Remodel You’ll Love
instant download
Little Black Book of Color
Download our free paint guide! Get our expert guidance for your entire home with our 30 page paint guide.
The exclusive Boxwood Avenue paint guide to achieve a perfectly cohesive palette in your home!

Hello Chloe, thank you for the discussion about the concrete counters. I found the article enlightening as my wife was interested in something similar if sourcing decently priced granite or quartz doesn’t work out. In hindsight, would you say that the final product was worth the $28/ sq ft? I ask because the more common granite patterns in my part of N. FL run about $35:$50/SF installed.
Hi Joe – the additional cost of granite/quartz is worth it! I would not recommend concrete countertops.
Hi. I don’t understand what you mean about installing the sink first and then making a mould of the sink to use in the countertop.Can you explain this process a bit more, as I am about to make my own concrete counter, but don’t understand the snik part and have a new white granite sink to install.
Hello! We installed the sink first because it is an undercount sink. Meaning it needs to sit under the countertop. Since it is not perfectly square, you can’t use the forms to create a barrier/mold to prevent the concrete from going places you don’t want it to go. So you’ll need to create your own mold from foam or something that you can secure into place to act as a mold/barrier which will direct the concrete into the areas you want it to go, and prevent it from filling up the sink. I hope that is helpful!
My sister and I are talking about wanting a cement countertop for our loft apartment because we wanted the concrete to match the industrial look of the entire apartment. I like your tip on doing a test-pour with a dummy mold just to let you get the hang of the process, instead of doing it on the countertop itself without prior knowledge or experience. I’m not sure what kind of concrete we would like to have yet, but I’m going to look into which contractors can help us in picking the best type of concrete for this project and assist us in the process from start to finish.
Choosing the right countertop is a crucial decision when building your kitchen. But purchasing concrete countertops can be an overwhelming experience, with high price tags and plenty of options. To prepare your home for the concrete countertop, a variety of supplies are required for installation. The concrete slab is a strong foundation that provides a lasting, premium surface for your kitche